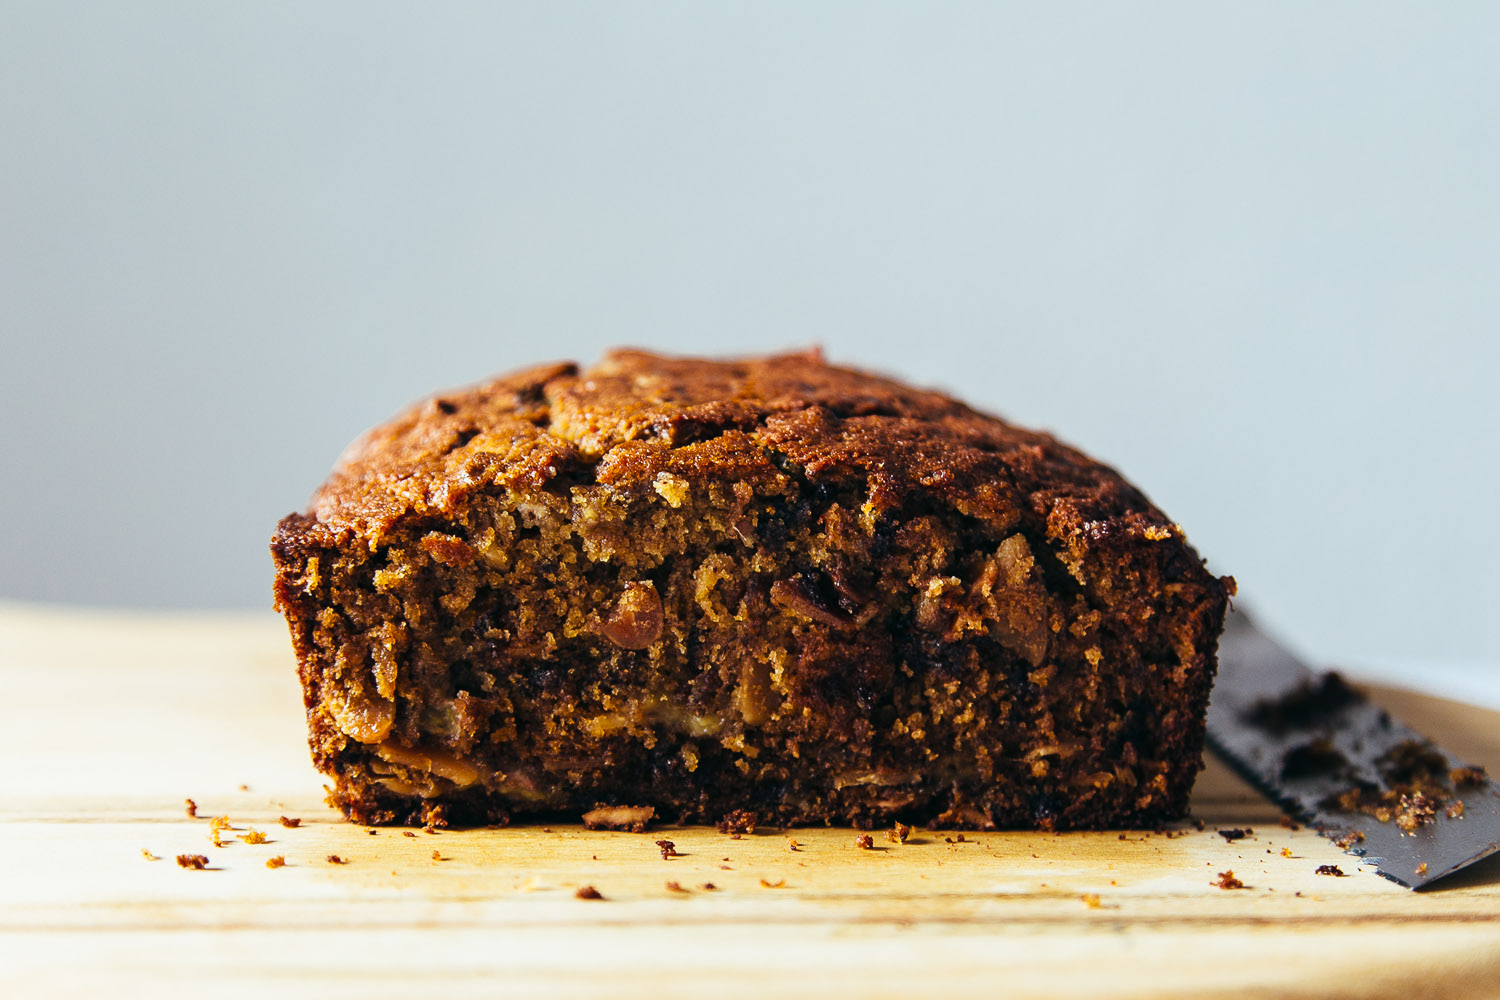
Spunky banana bread
Posted on May 6, 2014
 Everybody loves a good banana bread. Somewhere in between a dessert and a savoury, and labelled as bread to make it a valid “healthy option”. Win win.
The reason why this one is so spunky, however, is due to the addition of dark chocolate and a few handfuls of toasted flaked almonds. The original recipe called for hazelnuts but it was 11:15am, my shift was due to start at 12pm, and I had to make the executive decision to use the already ready almond flakes over my non-toasted non-chopped hazelnuts. It was a decision that I did not regret! Yes, I was a wee bit late to work – but I came bearing freshly baked cake and soon all was forgiven and forgotten…!
Ingredients
- 125g butter, softened
- 175g brown sugar
- 1 teaspoon vanilla extract
- 2 eggs
- 2 cups mashed banana
- 70g toasted almonds (flaked or slivered)
- 90g chopped dark chocolate
- 255g plain flour, sifted
- 1 teaspoon baking powder, sifted
- 1 teaspoon bicarbonate powder (baking soda), sifted
- 1 teaspoon ground cinnamon
- 115g golden syrup
Method
- Preheat oven to 160ºC.
- Prepare a 26cm x 11cm loaf tin.
- Beat butter, sugar and vanilla extract together until well combined and creamy.
- Add the eggs one by one, beating well in between.
- Finally, add the banana, almonds, chocolate, flour, baking powder, bicarbonate powder, cinnamon and golden syrup and stir to combine.
- Spoon mixture into your loaf tin.
- Bake for 75 minutes or until cooked when tested with a skewer.
- Cool in the tin for 20 minutes then turn out onto a wire rack to cool completely.


Share this:

Elotes callejeros
Posted on April 28, 2014
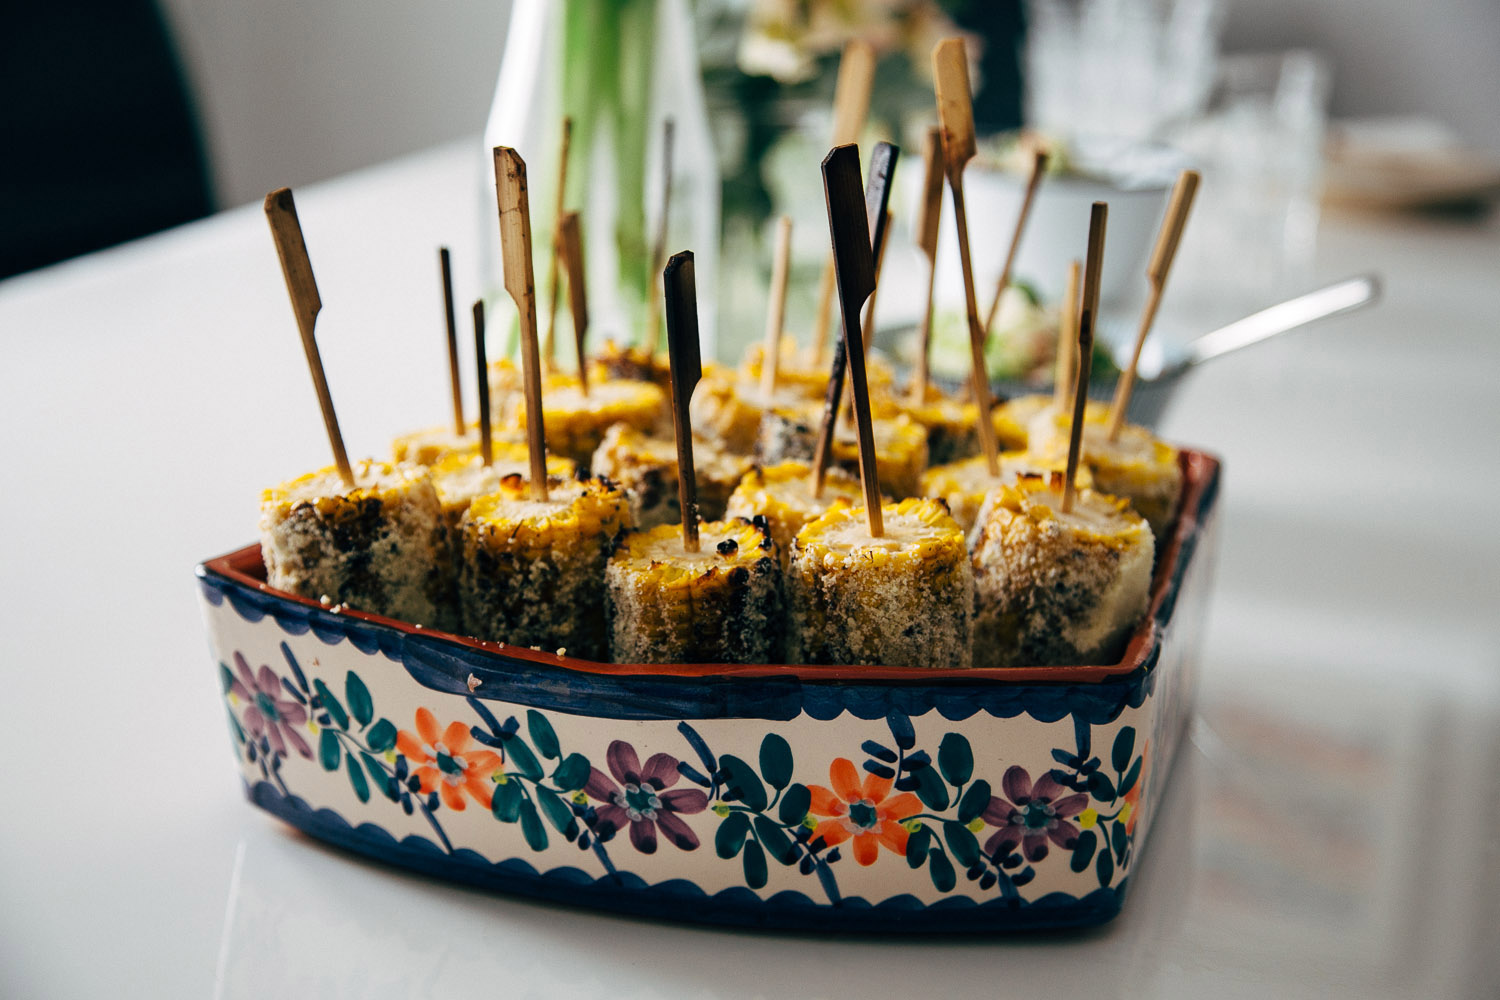
I first encountered this Mexican street style corn whilst at a flea market in Brooklyn, New York, a year and a half ago. Jinn disappeared for a wee while whilst I was rummaging through some old records and when I turned around he had returned with two massive cobs of corn coated with some unknown substances and an even bigger smile spread across his face. I wasn’t even hungry but before I knew it, my corn had disappeared, every last little kernel inhaled deliciously into my eager stomach.
We’ve been trying to replicate it ever since and I think, by George, we’ve got it! Thanks to stumbling across this rad Jamie Oliver recipe and putting our spin on it, we’ve now managed to spread the cheesy corn love to the rest of our family and friends.
Ingredients
- 6 large cobs of corn, husked and halved
- 4 tablespoons Japanese mayonnaise
- zest of 2 limes
- juice of 1 lime
- 1 teaspoon cayenne pepper
- 90g finely grated parmesan cheese (I find the almost powdered form the best as it sticks to the corn perfectly)
Method
- Soak the corn in cold water for at least 30 minutes.
- Mix together the mayonnaise, lime zest, lime juice and cayenne pepper. You can add more lime juice to taste. Now spread the mixture onto a large plate.
- Spread the grated parmesan onto another large plate.
- Preheat your barbecue or a griddle pan to high heat. Whilst you’re waiting you can skewer your corn for ease of consumption.
- Roll each piece of corn in the mayonnaise mixture. Cook the corn for 12 to 15 minutes each, turn occasionally.
- Now roll your nicely charred corn in the parmesan. Shake off any excess cheese.
- Get in quick. They’re that good.
Share this:

Citrus iced tea
Posted on March 21, 2014
 So after a few chilly nights where the doona came out last week, I thought this was it! Autumn was here to stay. But no, it doesn’t seem like Summer’s ready to loosen its grips on us just yet and those fluffy coats I purchased online a week ago have to sadly remain in the spare cupboard a little while longer…Darn it…
But here’s a quick and ridiculously easy iced tea recipe that I made on the weekend. It highlights Earl Grey’s naturally citrusy tones with the addition of an orange, peel and juice!
Here’s how to…
Ingredients
- 1/4 cup loose Earl Grey tea or 12 Earl Grey tea bags (I used French Earl Grey from T2)
- 1 orange
- 1L boiling water
- 1L cold water and lots of ice
- 1/4 cup sugar
Method
- Peel the orange so the rind comes off in one long strand (I did this with a knife). Reserve the rind.
- Juice the orange and set aside.
- Steep tea in your boiling water and add orange rind. Leave for 3 to 5 minutes.
- Remove the tea and rind.
- Stir in the juice and sugar, mixing to ensure all the sugar has dissolved.
- Add cold water.
- Top up with heaps of ice if you wish to serve it now. Otherwise chuck it in the fridge and enjoy it later!
Done!
Share this:

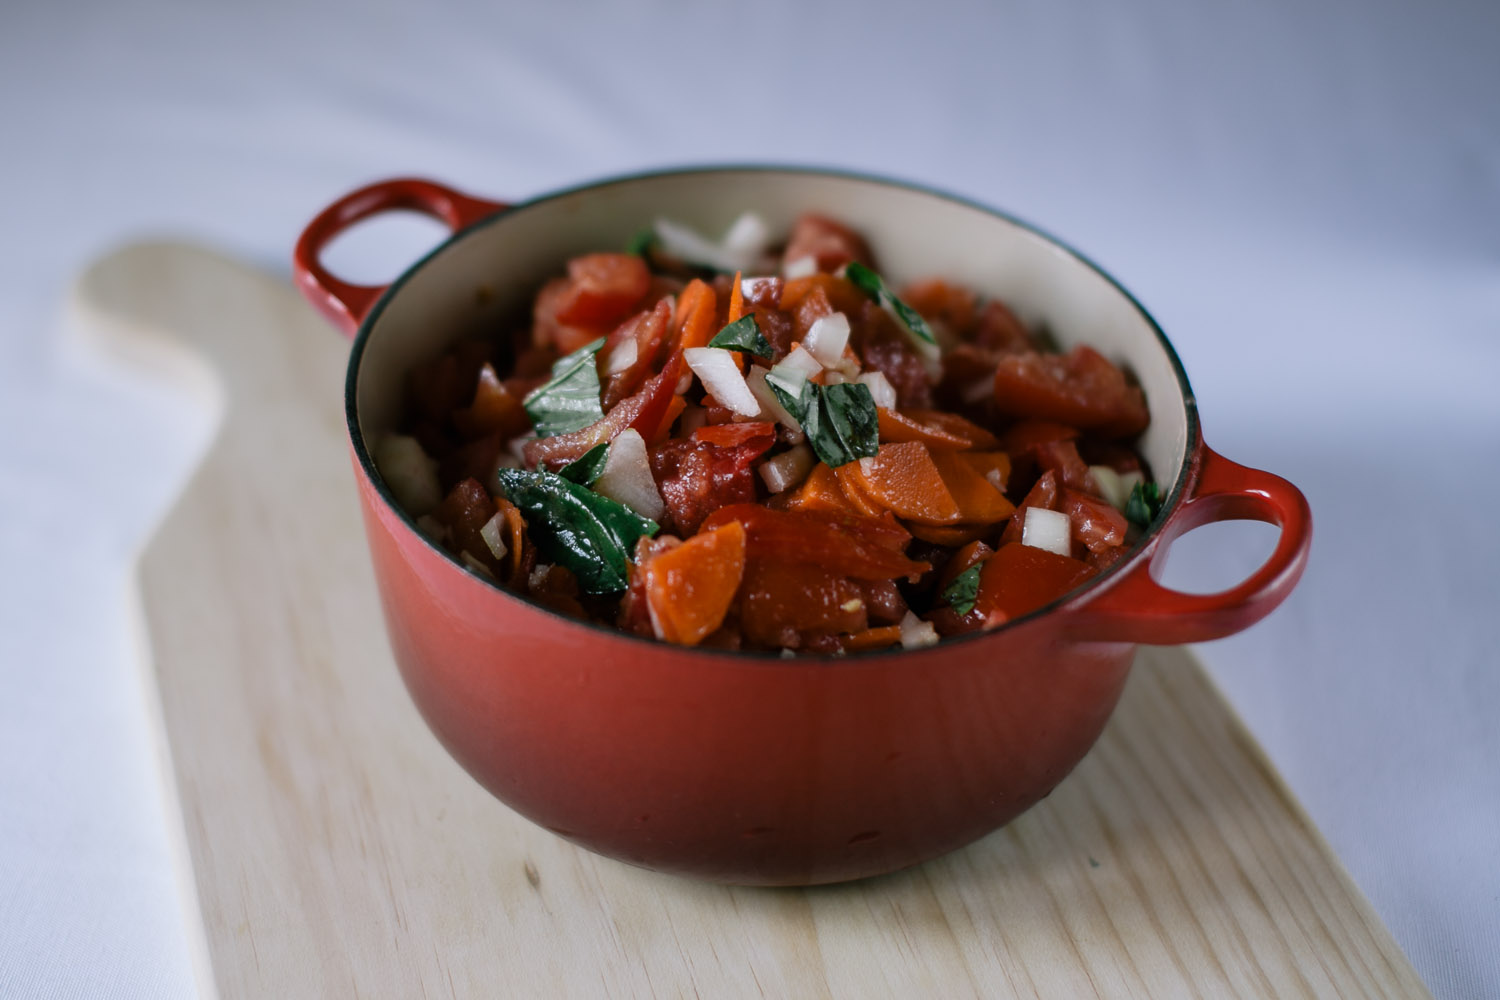
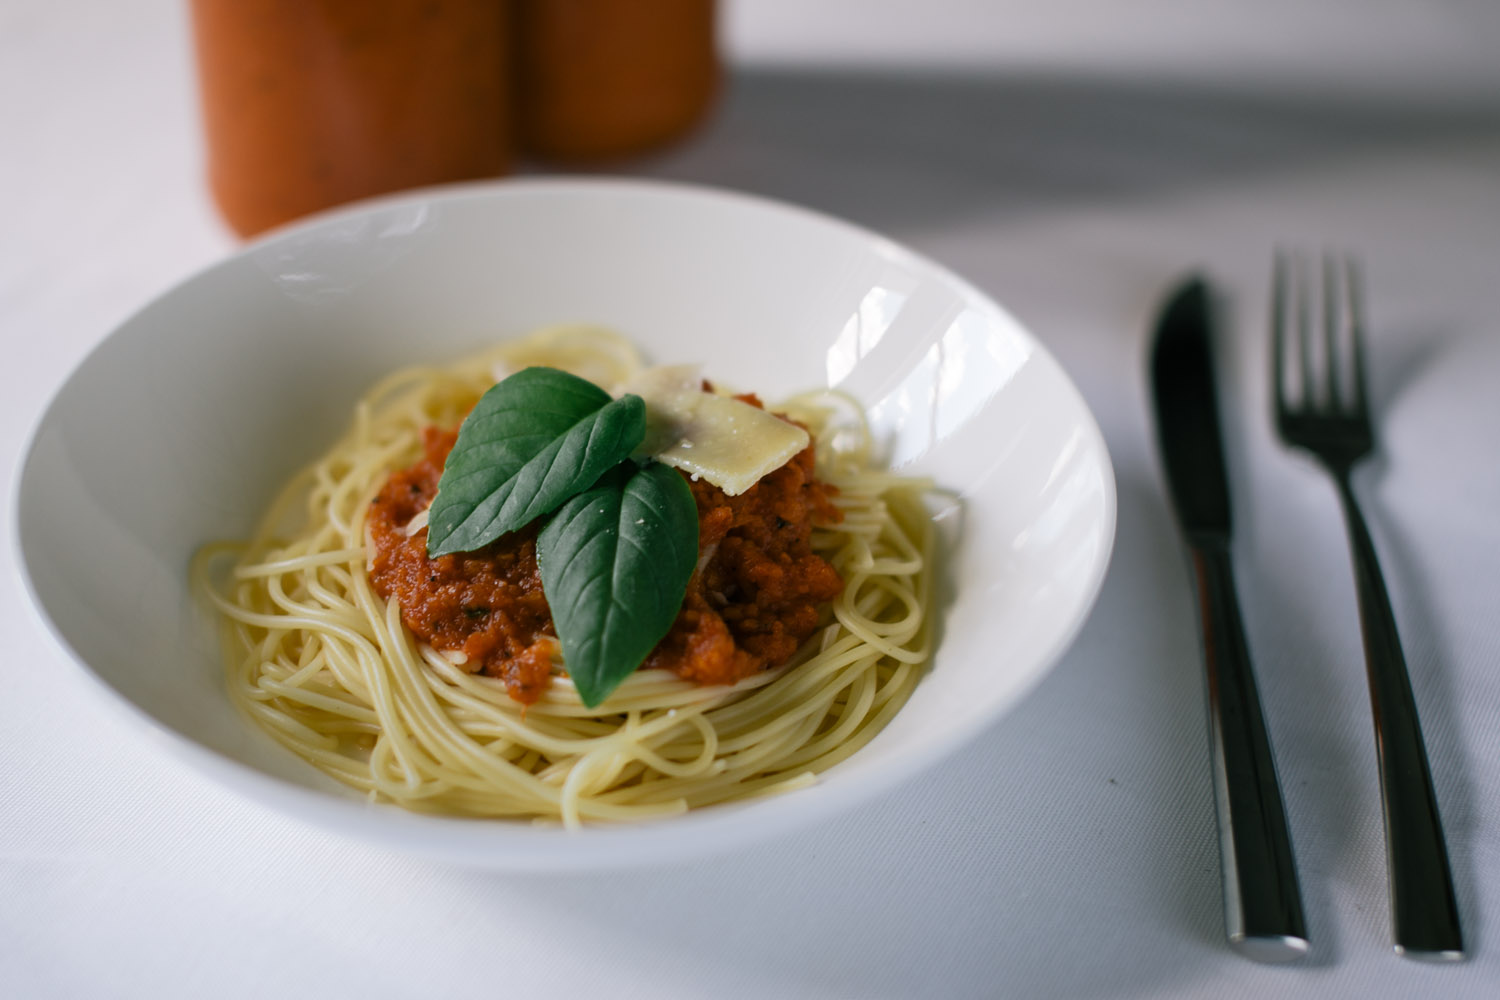
Oven Baked Tomato Sauce
Posted on January 29, 2014
 Many many years from now, I’d like to retire and have a small backyard orchard, full of productive fruit and vegetable crops. We would have far too much of everything to know what to do with, and we’d give it all away to family, friends, and neighbours. With all the extra tomatoes we’d grow, we would make litres of tomato sauce and bottle it up, becoming slightly famous as a result (because it tastes so damn good). It would be idyllic.
Well, the other day, I could scarcely believe it when my parents gave me 2kg of tomatoes. Here was my chance to have a head-start on retirement and make some homemade pasta sauce!
– Jinn

Oven Baked Tomato Sauce
This is a great base sauce that can be enjoyed by itself on pasta, served with fresh basil and parmesan, or in a casserole, stew or with meatballs. It can be left on its own in the oven for hours, allowing you to get on and do other things!
Ingredients:
- 1kg tomatoes – cored with seeds removed and roughly chopped
- 2 carrots, thinly sliced
- 3 cloves of garlic finely chopped
- 2/3 cup of olive oil
- 2/3 cup of red wine or red wine vinegar
- 15 basil leaves – torn up
- Salt and pepper to taste at the end
- Preheat oven to 150C
Method:
- Mix all ingredients together in a 2L casserole or dutch oven, even a roasting pan will do. Cover and bake for at least 2 hrs – baking for longer will result in a more concentrated sauce.
- Allow to cool.
- Blend the sauce until smooth with a food processor.
- Salt and pepper to taste.
- Bottle it up and give to your family and friends.
- Easy as!
Adapted and altered recipe for pasta sauce from Stephanie Alexander’s Kitchen Garden Companion.


Share this:

The Kinfolk Table
Posted on October 29, 2013


After much anticipation and many a bated breath The Kinfolk Table finally landed on our doorstep the other day. Most of you will know that Jinn and I are both massive Kinfolk fans and have been eagerly buying their magazine since they first started up (aside from the elusive first issue – argh!). The Kinfolk Table is a beautiful combination of gorgeous photography, inspiring recipes from all around the world and the stories behind them. As always, the emphasis is on small gatherings and genuine relationships. Their very words sum up an attitude to life that I aspire to – to “show up at life’s feast with an open heart and a genuine spirit”. This is a book crammed full of an abundance of simple, home cooked food that is real, tasty and unpretentious.
All images courtesy of Kinfolk
Share this:

Rustic Palak Paneer
Posted on September 27, 2013
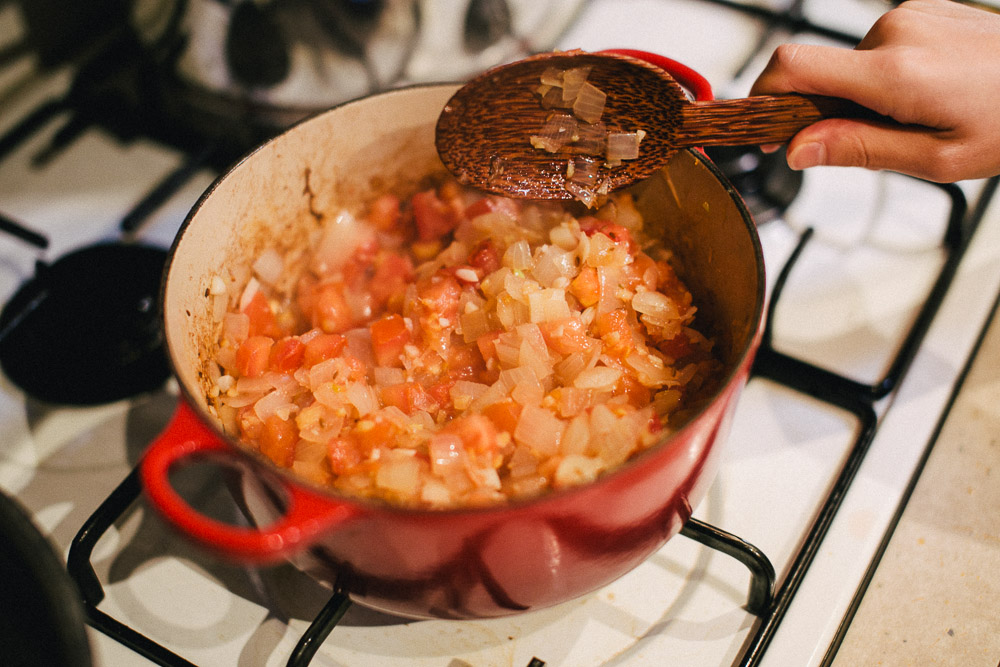
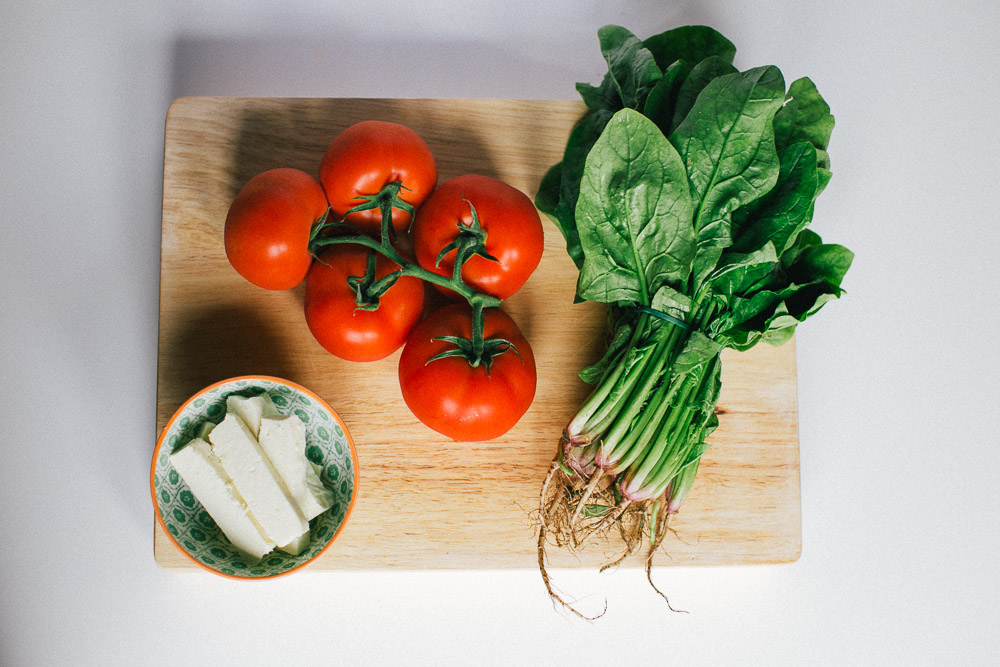 I’ve always had a thing for this delicious Indian dish – the greenness of the spinach, the texture of that paneer (it’s something like a firm Indian cottage cheese), the slightly mysterious nature of the spices used. I adapted a recipe from one of my favourite sources (SBS Food) and I was pretty pleased with the result! Instead of pureeing the blanched spinach I coarsely chopped it (because I’m lazy and couldn’t be bothered washing the blender), and I must say I quite liked the texture.
Here’s my adapted recipe! It tastes amazing with some brown rice that’s been fragrantly cooked with cinnamon, cardamom and cloves…
Rustic Palak Paneer (serves 4)
Ingredients:
- 2 bunches of spinach, leaves picked
- 2 tbs vegetable oil
- 1 tsp cumin seeds
- 2 cm piece of ginger, crushed
- 6 garlic cloves, crushed
- 1 medium onion, finely chopped
- 200g chopped tomatoes
- salt to taste
- 200g paneer, cubed
- 1 tsp powdered fenugreek
- pinch of garam masala
Method:
- Pick the leaves of the spinach and discard the stalks. Make extra sure that you wash out all the sand, grittiness in this dish is not generally desired! It may take a fair few washes.
- Blanch the spinach in boiling water for 2-3 minutes and dunk them in cold water to stop the cooking process.
- Coarsely chop. (Or finely, if that’s the way you roll)
- Heat the oil in a saucepan. Add cumin seeds, ginger, garlic and onion and fry until fragrant and slightly golden brown.
- Add your chopped tomatoes and cook until very soft.
- Stir in the spinach and season fairly generously with salt.
- Add the paneer and stir for long enough for the cheese to heat through.
- Add the fenugreek and garam masala at the end.
- Serve with basmati rice and your favourite curry! Personally I think this dish goes amazingly with butter chicken…
Recipe adapted from SBS Food.

Share this:

Meet Sue Lewis – artisan chocolatier extraordinaire!
Posted on January 31, 2013
 Meet Sue Lewis – artisan chocolatier. Her fine craftsmanship and deep respect for the ingredients she uses is tasted in every piece of chocolate her hands make. Forget Bruges. Forget Lucerne. Here in Perth is where you’ll find the freshest, most delicious handmade chocolates you’ll ever taste.
As you enter Sue’s store at 44 Derby Rd Subiaco, you’re instantly welcomed by stands upon stands of freshly made treats and (if you visit during an afternoon) you may be lucky to meet the incredibly talented and passionate lady herself. Upon saying hello I was offered a fresh-off-the-press creme-brulee inspired chocolate that she was making there and then! The incredibly crisp chocolate shell delicately breaks in your mouth to release an amazingly rich yet not overpowering caramelly centre, perfectly balanced by the bittersweet chocolate. (If only I was greeted that way more often!) I got the amazing opportunity to speak to Sue, and got an insight into the creative mind behind the chocolatier-ing process and what drives her.
Sue has had a long relationship with food, starting off in the kitchens back home in England as a youngster, working hard in the good old-fashioned way and progressing up the ranks. She’s had an illustrious and enjoyable career which has resulted in her working for more than twenty years in a number of reputable restaurants in London, including the eponymous Alastair Little in Soho and Anna Hansen’s The Modern Pantry. Despite not formally training as a patissiere, with a little bit of right-place-right-time luck (and I’m sure a lot of good reputation preceding her), Sue got the chance to work with Paul Young, who is not only a groundbreaking chocolatier currently leading the way in London’s gustatory sphere but who has also previously worked as one of Marco Pierre White‘s head pastry chefs for ten years. That’s some seriously big names there. (Have you been watching your MasterChef? If you’re not sure who I’m talking about, you’ve heard of Gordon Ramsay right? Well, let’s just say he was trained by Marco Pierre White who is rumoured to have made the aforementioned stony-faced potty mouth cry.)
This is a place I would definitely go out of my way to discover. Sue Lewis is not only a purveyor of beautiful chocolates but she also freshly produces the most irresistible ice creams and sorbets (think 70% Valrhona chocolate rippled with Calypso mangos or a luxuriously smooth sea salt caramel) that are an absolute God-send this summer. Trust me, you will not leave Sue’s empty-handed nor empty-stomached.
Here is a snippet of the fascinating and delicious afternoon I spent with Sue.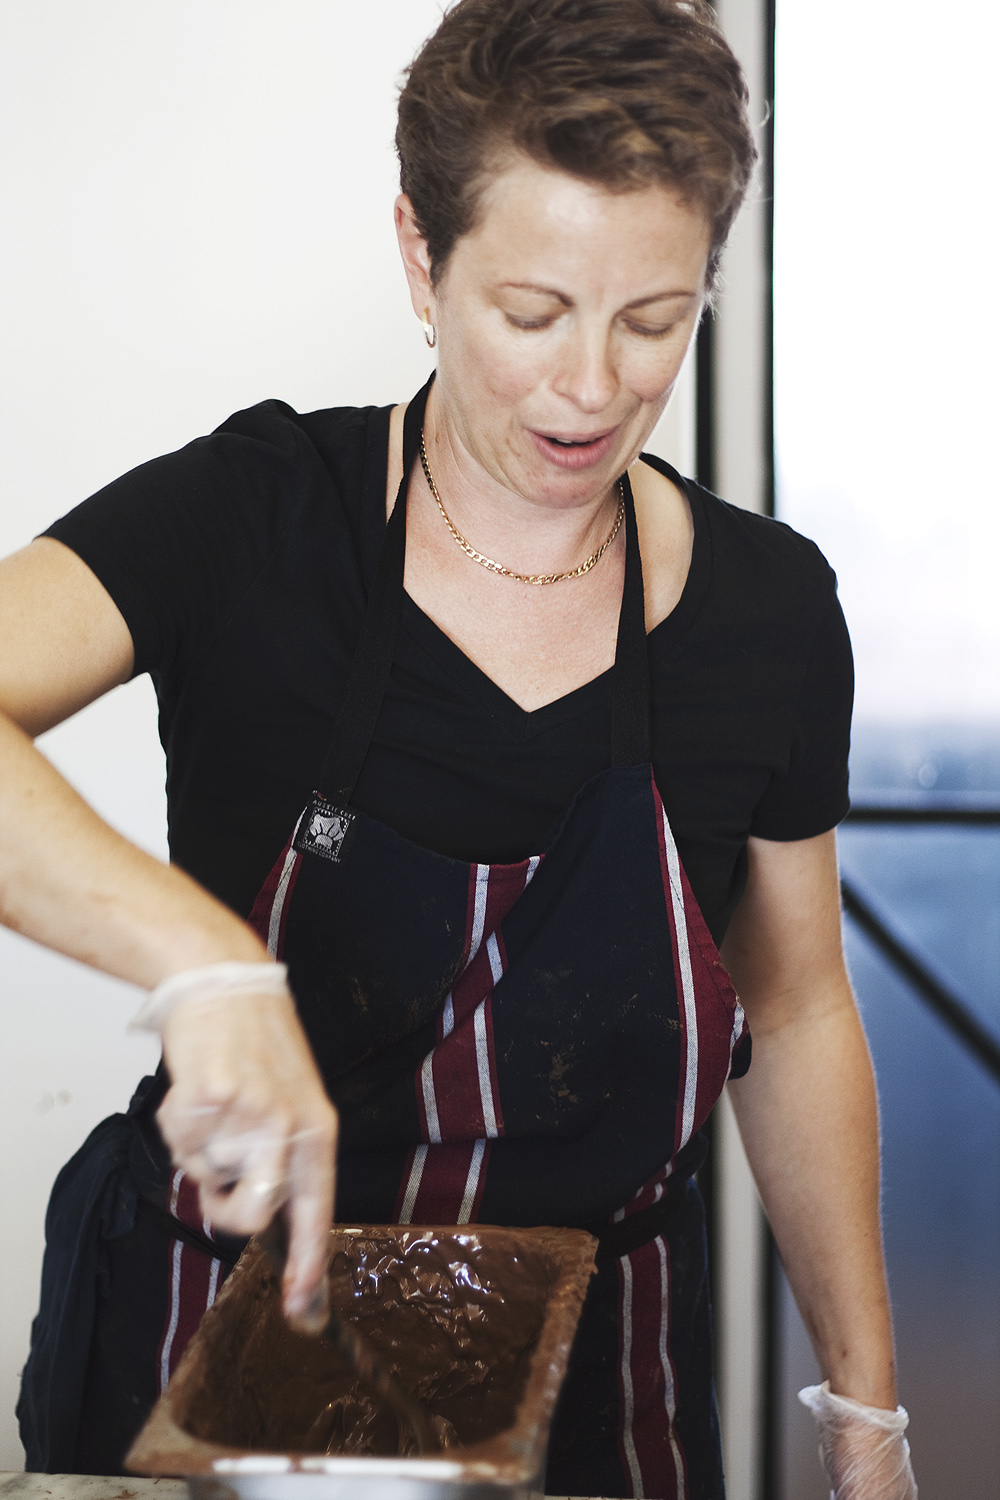


Let’s start with a little about yourself. You’re a long way from home and have worked with some of the greatest names in food, so what brings you to Perth?
I suppose you could say I had a midlife crisis! I wanted to be somewhere less dreary and hectic than London, somewhere sunny and near the beach. I’d been to Perth a couple of times before visiting friends, it’s a beautiful city that ticked all the boxes – and so I thought, why not! I arrived and made Perth my home in October 2011 and finally got my store up and running in December 2012. It’s only a tiny shop, just enough for my marble slab to work my chocolate, my ice cream machine and the cashier, but I actually live upstairs! I have a lovely kitchen there where I do more baking and experimenting, and I also love relaxing out in my wee garden up there.
So what motivates and inspires you?
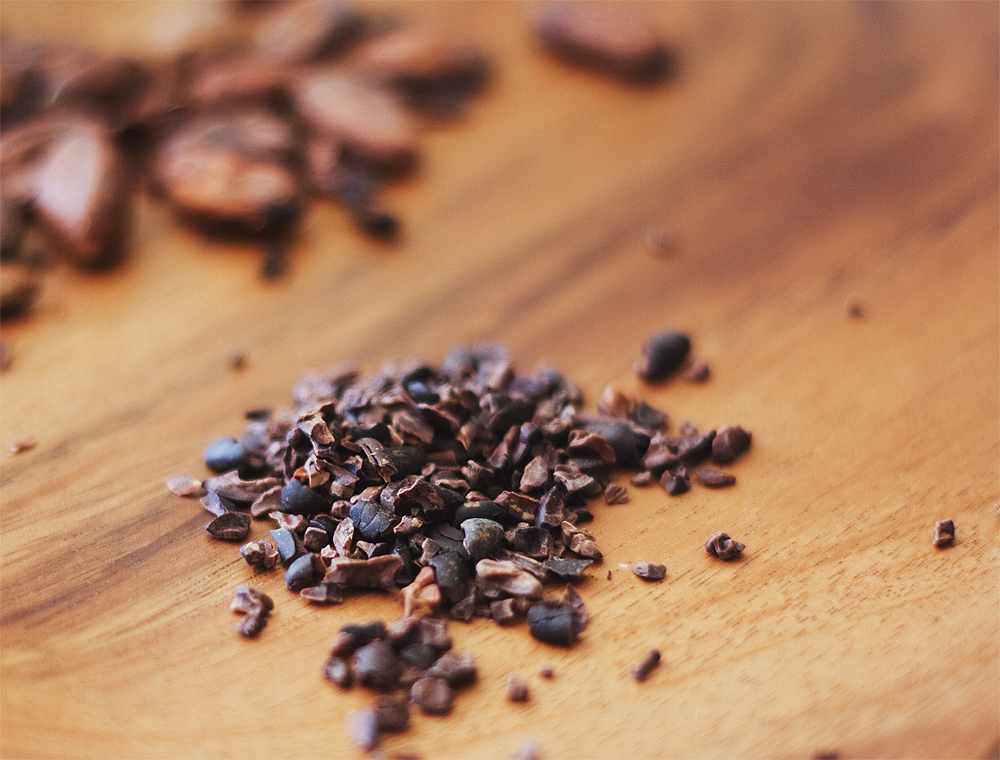
First and foremost is the quality and the source of the chocolate I work with. It’s very important to me that it comes from organic and ethical sources. One of the sources I use a great deal of are Bahen & Co who happen to be based in a family operated farm in Margaret River. All their chocolate is made with vintage equipment in the purest and most traditional of ways, and out of only two ingredients – cacao and cane sugar. No nasty or cheap additives, so it’s absolutely fresh and jam-packed with flavour.
Secondly, I’m influenced by the seasonal and local produce and try to incorporate it in creative and clever ways into my chocolate. For example, the mango season has been fantastic and so they’ve featured heavily over the summer. One of my latest creations specifically for Australia Day was made with Western Australian honey and wattle seed – so good!
I’m also a supporter of the Slow Food Movement, which was started in the 1980s to counteract the effect fast food was having on society. Essentially, good food should be linked with an awareness of your community and environment. I think it’s really important to be knowledgeable about where your food comes from and the wide-reaching effect your choices can have on the rest of the world.
I’m very passionate about getting the freshest and purest ingredients for my work, never adding any hidden preservatives or shortcut additives, so that what I create is injected with the best flavours and of the highest quality, and I hope others can see and taste that too.
So what is the next step for your store?
I’m currently holding chocolate tasting and tempering classes every Thursday night. Each student is greeted with a glass of bubbly and taken through the basics of chocolate tasting, and I share with them the fascinating process by which a tiny cocoa bean is harvested and ultimately makes its way into the form of the delicious chocolate we universally love. We then go through a lesson in chocolate tempering where I show everyone once and for all that it really isn’t impossible to get right! Like I say, if you haven’t poured kilos of beautiful melted chocolate out onto a cool marble slab at least once – you haven’t lived! At the end of the evening, everyone gets a box of Sue Lewis chocolates to go home with. Whether you actually arrive home with the chocolates uneaten – well, that’s up to you. Either pop in or email me at info@suelewischocolate.com for bookings and more details!
I’m also looking to collaborate with other like-minded foodies around Western Australia to drive this push to promote ethical, organic and local produce. It’s not just important for the food we eat ourselves today, but also for the future.
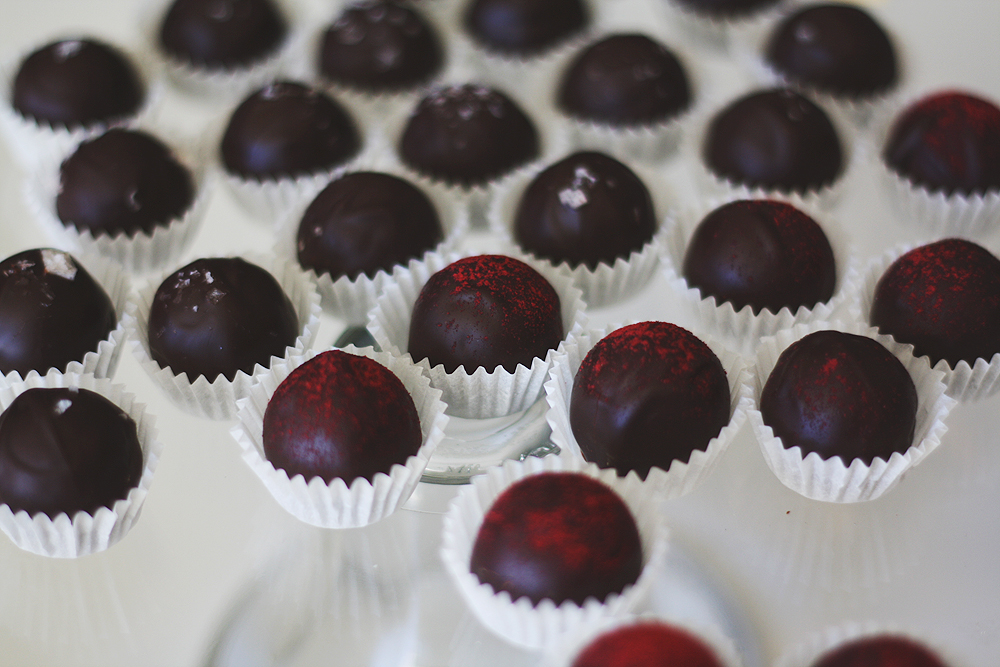
Come visit Sue. If you want to taste a bit of heaven in a chocolate truffle that explodes in your mouth, the pleasure of ten degustation courses compacted into a morsel that fits in your palm, and made from the finest and freshest of ingredients by hands and a heart so passionate about their trade – this is the place to be.
Sue Lewis Artisan Chocolatier / 44 Derby Rd Subiaco
0452 423 323 / info@suelewischocolate.com / Facebook / Website


Share this:

Figs + Persian feta = match made in heaven!
Posted on January 23, 2013
 I was recently browsing through my Instagram newsfeed when I came across a delectable photo of a fig and feta salad that someone else had uploaded (Thanks @fromforestsforthesoft aka Perth fashion stylist Hannah McGrath!). For some reason I had three large figs in my fridge (I don’t actually like to eat fresh figs, I think I bought them because they looked nice!) and so I instantly knew I had to try to emulate this salad. I paired them with Persian feta which has a rounder taste and smoother texture than your regular Greek-style feta, and they complemented the sweet, soft figs perfectly! It’s a seriously easy dish, super fast to whip up, and very satisfying. Here’s how I made my version…
Ingredients:
- 400g mixed salad greens, washed and dried
- 100g whole walnuts
- 3 large figs, sliced about 8mm thick
- 3-4 cubes of Persian feta
- 1 tablespoon honey
- extra virgin olive oil
- cracked black pepper
Method:
- Preheat the oven to 190°C.
- Spread your walnuts out on a baking tray and bake for 8-10 minutes, they’re ready when they brown up and you can smell their nutty aroma. Take them out to cool.
- In the meanwhile, place your fig slices and honey in a bowl, add a splash of olive oil, and coat the figs by gently stirring (not too vigorously or else you’ll pulverise the figs!)
- Heat another dash of olive oil up in a large fry pan over medium heat. Gently pan fry the fig slices, taking care to maintain the shape and form of the fruit. They only really need 1 minute on each side, you’re only aiming to heat them up.
- Arrange your salad greens on a nice big bowl or platter, then top with the figs, walnuts and feta. I like to break the feta up into smaller pieces with a teaspoon and somewhat scatter them around.
- Finish off with a bit of cracked pepper and another slosh of glorious extra virgin olive oil.


Share this:

Vietnamese-style fish cakes – The Silver Spoon #7
Posted on January 10, 2013
 So over the weekend my brothers decided to be all manly and stuff and went deep sea fishing. They were pretty successful, and amongst a few things managed to catch a shark! (That’s pretty manly.) As a result, I found myself with one and a half kilos of shark meat and a big question – what on earth do I do with one and a half kilos of shark?
I’m not a big cooker of fish to begin with since I always somehow manage to stuff it up, which generally results in a horrible dinner and a terrible sense of guilt for ruining a beautiful (and often expensive!) piece of fish. Dissatisfied bellies and sad faces all round.
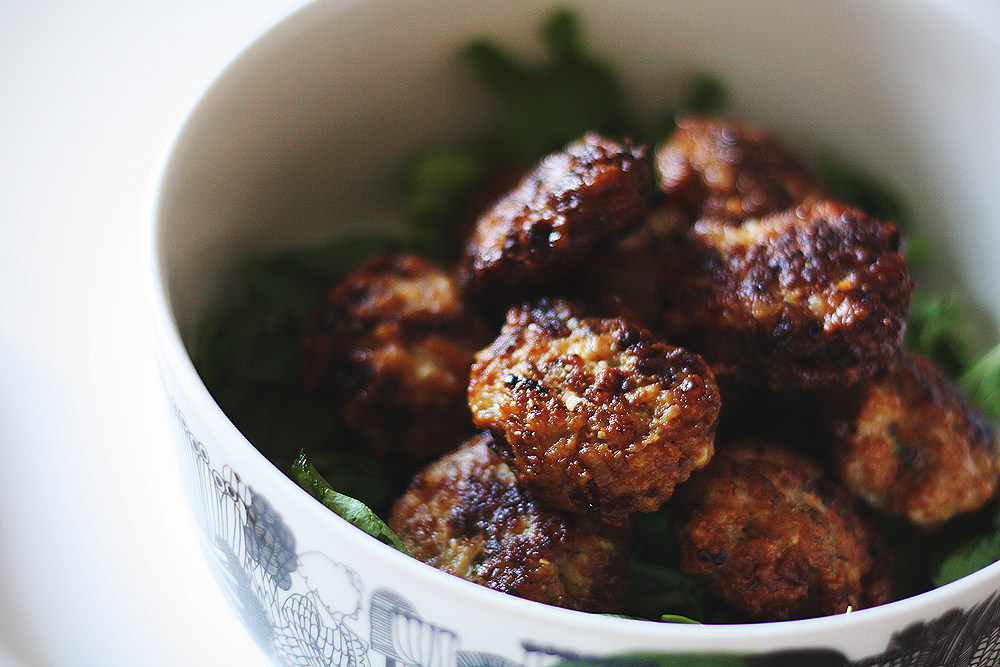
I happened upon this Vietnamese fish cake recipe by Luke Nguyen on the SBS Food Safari site (how badly do I want the Food Safari lady’s job!) and after a few modifications came up with these lovely little morsels! I think due to the nature of shark meat the fish cakes came out quite firm and “meaty”, but I think it actually worked well and tasted great. I enjoyed mine dipped in sweet chilli sauce and washed them down with a cold glass of home-brewed iced jasmine tea. I still have at least thirty of these fishy bites left (I used all the shark in one go) and I think I’ll try them next on a bed of rice noodles with lettuce leaves, mint, bean sprouts and shredded carrot…
Ingredients:
- 500g fish fillets, cubed (the original recipe calls for Spanish mackerel)
- 1 tablespoon fish sauce
- 1/2 teaspoon salt
- 1/2 teaspoon freshly ground black pepper
- 1/4 teaspoon sesame oil
- 1 garlic clove, finely diced
- 4 shallots, diced
- Vegetable oil for deep frying
- Sweet chilli sauce for serving
How to:
- Place all ingredients (except vegetable oil and sweet chilli sauce) in a food processor and process until all ingredients are incorporated into a paste. If you’re more dedicated than me, you can use a mortar and pestle rather than a food processor and pound the fix mixture until it gets a more elastic consistency.
- Make patties out of the mixture, roughly 5cm in diameter and 2cm thick. Oil your hands so the fish doesn’t stick to you.
- Heat the oil in a wok or other large non-stick pan over medium heat. Fry the fish cakes in batches and fry for 3-4 minutes each side until golden.
- And that’s it! Serve with sweet chilli sauce for dipping.
P.S. Check out the giant chilli from my garden! Its “parent” plant had normal-sized chillis so who knows why this one has mutated!

Share this:

Matcha do about a green cake! …The Silver Spoon #6
Posted on December 20, 2012
 Ever since our honeymoon in Japan, I’ve been a huge fan of Japanese tea in all its forms. Sencha, genmaicha, houjicha…There are many different types with varying delicious flavours, plus they’re good for you, packed with lots of antioxidants! This cake recipe incorporates matcha, which is essentially the finest quality green tea leaves ground into a fine powder. It is traditionally whisked with hot water into a bright green suspension and served at Japanese tea ceremonies. I bought mine from the little Japanese Green Tea House in Subiaco, but it should be available at any Japanese grocery store. If you’re ever in Subiaco with a spare minute or two you must pop in! Tsutomo is the lovely gentleman who owns the store. He is very passionate about green tea and travels regularly back to Kyoto to bring back the high quality teas he sells us. He’s always more than happy to sit you down at the counter to taste a few different teas and teach you the correct ways to brew them. It’s highly likely you won’t leave empty handed!
There are varying levels of matcha quality but you only need the cheaper end of things as we’re just using it for baking, not drinking. I’ve used it here to add its distinct yet subtle flavour and of course its interesting colour to a fairly basic pound cake recipe. Really easy to make and goes down amazingly well with a cup of black coffee!
Ingredients
- 225g unsalted butter, room temperature
- 225g caster sugar
- 4 eggs
- 225g plain flour sifted
- 1 teaspoon baking powder
- 2 tablespoons matcha
- A splash of vanilla essence
How to
- Preheat oven to 170°C.
- Cream the butter and sugar together with a handheld beater.
- Beat in eggs, one at a time, then add also the vanilla essence.
- Sift together the flour, baking powder and matcha.
- Fold flour mixture into the batter.
- Bake in preheated oven for 40-45 minutes, or until cake skewer comes out cleanly.
- Serve to unsuspecting friends and tell them its mould! Nah, really it’s a gorgeous green colour with more punch and character than pistachio…! Enjoy!


Look at that beautiful green inside peeking out!

